Quickstart Guide#
This guide is designed to help you get up and running quickly with HyperSpyUI.
Launch#
Sarting the HyperSpyUI application can be dependent on how it was installed. If it was installed into the OS, a shortcut might have been created on your desktop, and running the shortcut should then be enough to start the program.
If you do not have a shortcut, the app can typically be started by running
the command python -m hyperspyui. This assumes that the python
command is available from wherever you are running it. If that is not the case,
figure out the full path to the python executable, and run it as above
<full path>/python -m hyperspyui.
The final option is to fully explicit:
<full path to python>/python "<full path to hyperspyui>/__main__.py"
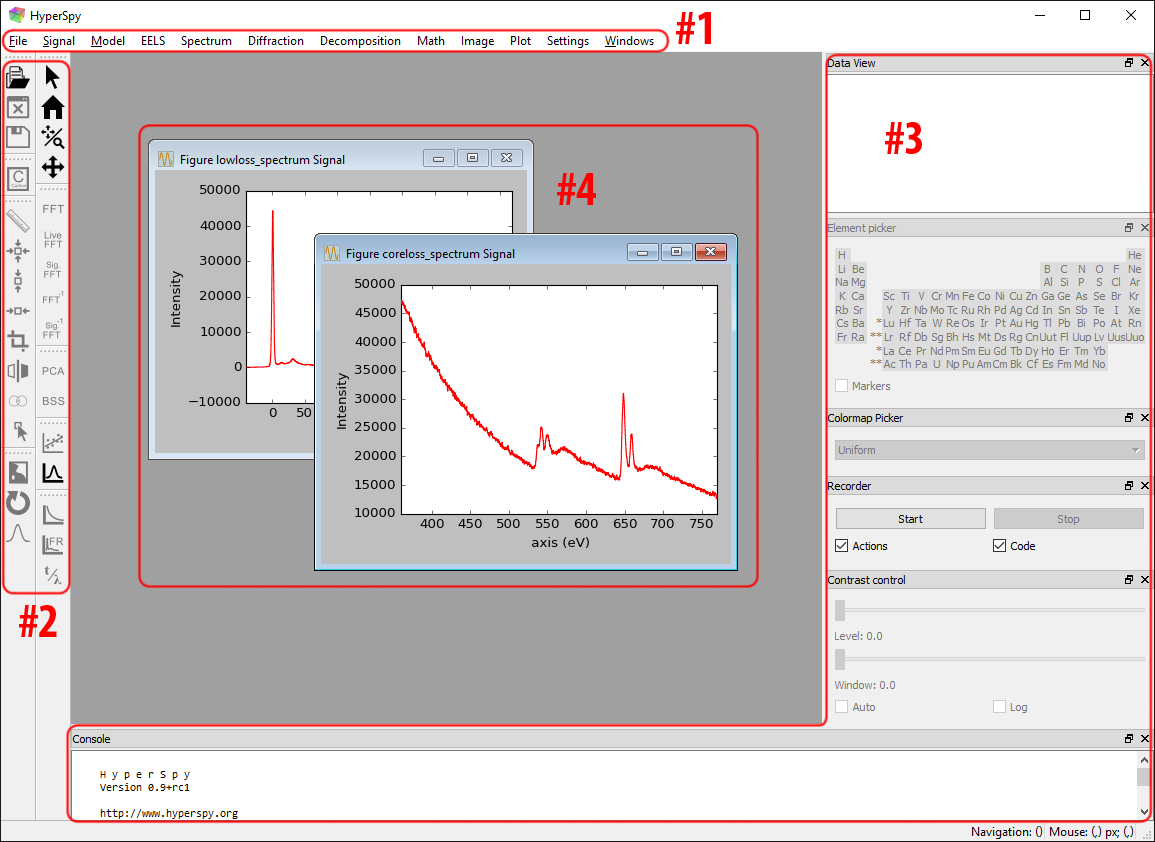
Overview#
The user interface is based on top of Qt, and have four main components:
Menus: Most of the actions you can do have a menu entry.
Toolbars: Several actions have their own button on a toolbar, and all interactive Tools are here as well.
Widgets: These are small panels or windows that can be moved, and are always open unless explicitly closed. Their content and behavior can vary widely, and includes the Data view and the Console widget.
Figures: The final component are the figures and plots that are generated. These include all matplotlib figures, but the ones created by HyperSpy are the most interesting ones.
Loading data#
The standard way of getting data into the application is to open a file
supported by HyperSpy (Supported formats).
This can either be achived by dragging and dropping the file in question onto
the application window, or by the open file dialog accessible in the toolbar
( ), or from the File menu.
If you have registered the application with the operating system to handle some file types, files can also be opened in HyperSpyUI simply by opening them in a normal file browser.
Once the file is loaded, the resulting HyperSpy signal should automatically be plotted. If not, an error might have occured, in which case you should check your Error output.
Once the signal is loaded, you are ready to start inspecing and manipulating your data. See the following sections for a more detailed explanation of what can be done, or simply start playing around! It normally takes quite a conscious effort to overwrite existing data (“save” action, pick existing file name, confirm “yes I want to overwrite” dialog), so you should feel confident in playing around!